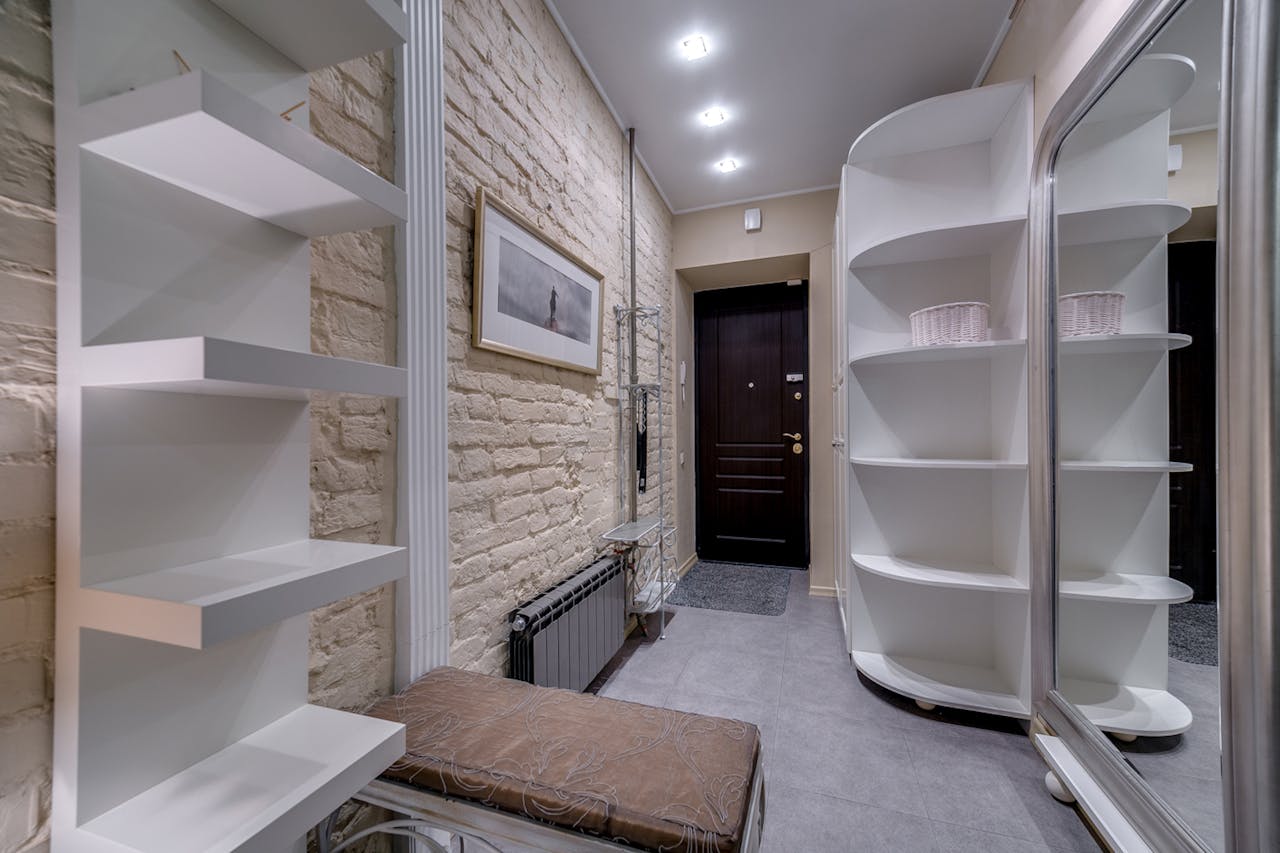
Why an Entryway Bench Still Solves Real Problems in 2026
In 2026, our homes are doing more than ever: office, daycare, gym, and retreat all in one. That’s why a simple entryway bench with storage still feels like a tiny superpower. It gives you a landing spot for bags, shoes, keys, and even tech, so the rest of your home stays calmer and cleaner. With the global home organization products market already topping $13.1 billion in 2024, demand for smart storage is still rising (Verified Market Research, 2024). (Verified Market Research) Building your own bench lets you match your space, style, and budget instead of compromising.
Plan First: Measurements, Layout, and the Storage Features That Matter
Measure Like a Pro: Width, Depth, Height, and Clear Walking Space
Before you buy a single board, measure your entryway at its tightest point. A comfortable bench height is usually 17–19 inches, with a depth of 14–18 inches so adults can sit without feeling like they’ll slide off. In very narrow hallways, aim closer to 14 inches and leave at least 36 inches of clear walking space in front of the bench so doors swing and people pass easily. For a one-person apartment entry, a 30–36 inch-wide bench feels roomy; for family traffic, think 48–60 inches or create two shorter benches that can flex around doors and vents.
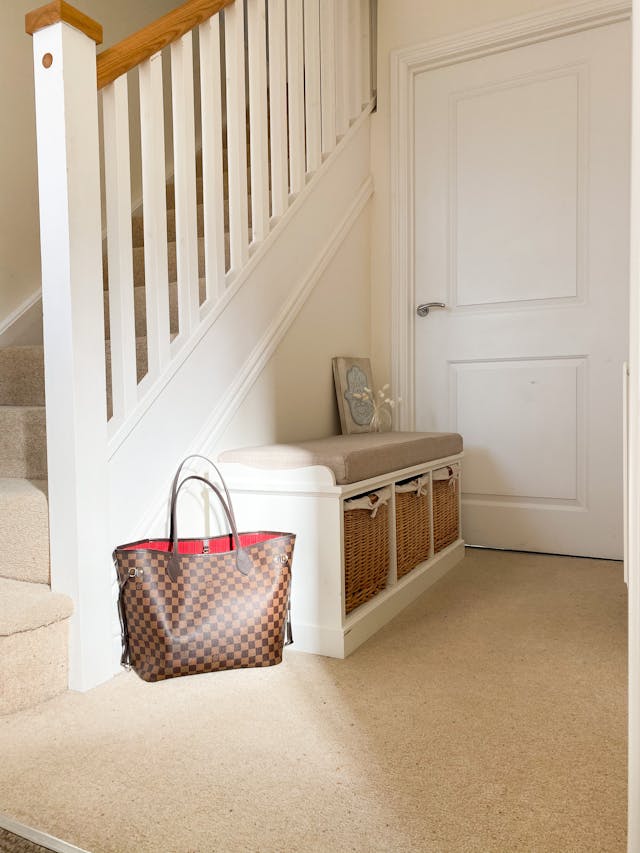
Pick Your Storage Style: Cubbies, Tilt-Outs, Drawers, or Lift-Top
The best storage style depends on who lives with you and how chaotic your mornings are. For most families, an entryway bench with shoe storage built as open cubbies is the sweet spot: everyone sees “their” slot, shoes dry out faster, and kids can manage it without help. Tilt-out compartments hide visual mess in small spaces and keep shoes off the floor, but they require more precise hardware and are harder to retrofit. Drawers are great for scarves, leashes, and hats, while a lift-top bench works better for bulky items like tote bags. If you’ve ever Googled “how to build a entryway bench with storage,” you’ve probably seen a dozen cubby grids for a reason—they’re the simplest to build and easiest to live with.
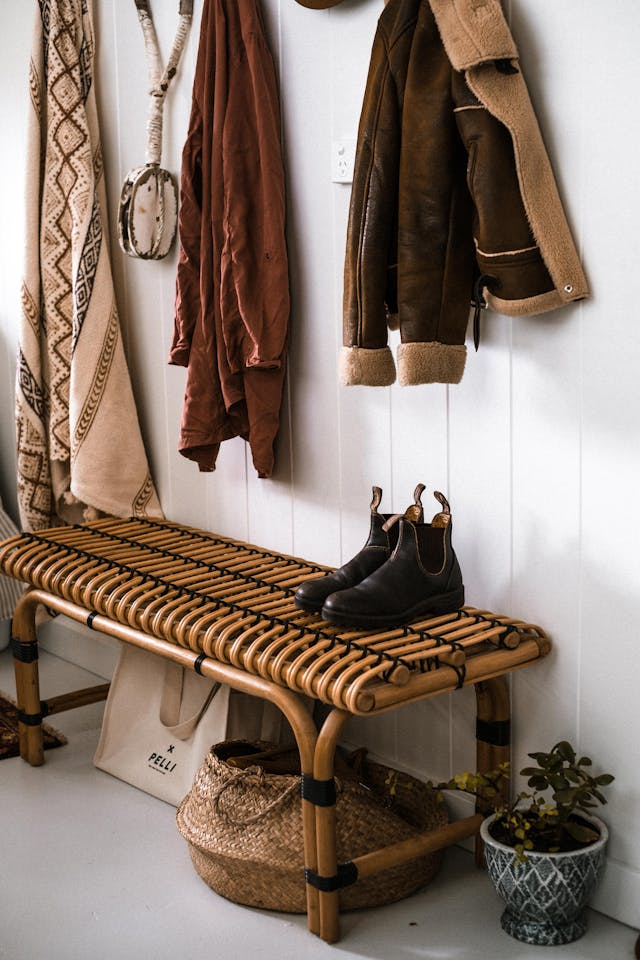
2026-Friendly Add-Ons: Charging Shelf, Hidden Hooks, and Pet Zone
Modern entryways are command centers, not just shoe-drop zones. Consider adding a shallow upper shelf with a built-in power strip or USB-C outlets for phones and earbuds. Hidden hooks mounted under that shelf can hold backpacks or work totes without visually cluttering the wall. One busy couple I spoke with keeps a low, open cubby at dog-nose level stocked with a leash, waste bags, and a towel—turning the bench into a mini pet zone that makes walks and muddy-paw moments smoother. Small details like these make the bench feel “built-in” to your life, not just your wall.
Materials & Tools: What to Buy (and What to Avoid) for a Durable Build
Best Materials for Entryway Use: Plywood, Solid Wood, MDF, and Veneers
Entryways see wet umbrellas, dropped backpacks, and the occasional soccer cleat, so durability matters more than perfection. Furniture-grade plywood (at least 3/4 inch thick) is a strong, stable choice for the box and dividers; it resists warping better than solid wood in fluctuating humidity. Solid wood works beautifully for the seat, especially oak, maple, or rubberwood, but may cost more. MDF is smooth and paint-friendly but hates standing water, so keep it off the floor and seal it well. With home organization and entryway furniture markets both projected to keep growing steadily into 2030, investing in long-lasting materials is a smart move (Reanin Entryway Furniture Market, 2024). (reanin.com)
Hardware That Makes It Feel High-End
The right hardware transforms a basic DIY into something that feels custom. Use soft-close hinges for lift-tops or tilt-out fronts so lids don’t slam on fingers, and ball-bearing slides if you include drawers. Simple metal shoe dividers or wooden slats help stand shoes upright and keep pairs together. Don’t forget safety basics: rounded or eased seat edges, felt pads under the base, and, for tall bench-and-cubby combos, a wall anchor kit. Securing a vertical unit to studs reduces the risk of tip-overs—which is especially important in homes with kids and pets.
How to Build an Entryway Bench with Storage: Step-by-Step Construction
Step1: Build the Base Box (Strong, Square, and Level)
Start with a simple rectangular box: two side panels, a bottom panel, a back, and a top frame rail. Cut everything from 3/4 inch plywood and assemble with wood glue plus screws through predrilled, countersunk holes. Add at least one center support to split the span if your bench is wider than 40 inches; this keeps the seat from flexing under weight. During assembly, check for square by measuring diagonals and adjusting before the glue dries. If your floor is uneven, use adjustable leveling feet or a separate toe-kick base you can shim until the bench sits perfectly stable.
Step2: Add Shoe Storage (Cubbies or Tilt-Out Compartments)
For an entryway bench with shoe storage, cubbies are the fastest win. Mark your grid on the inside of the box, then install vertical dividers first, followed by horizontal shelves. Pocket-hole joinery or simple cleats screwed into the sides can support the shelves with minimal fuss. For narrow hallways where open shoes feel messy, tilt-out fronts are a smart alternative. Mount a pair of side hinges low on the face frame, then attach a shallow box behind the panel to cradle shoes. Add a short chain or support arm inside each compartment so it stops at a comfortable angle when opened.
Step3: Finish the Top: Comfort + Durability
The seat should feel solid and inviting. A 1–1.25 inch-thick solid wood or laminated plywood top with a gentle 1-inch overhang on the front edge is usually enough. Ease or round over all exposed edges so they feel smooth under thighs and knees. If you love the idea of a cushioned top, design a subtle recess—about 1/4 inch deep—for a pad so it doesn’t slide around. Some people attach cushions with hidden Velcro strips; one family with young kids simply added two corner straps so they can remove the cushion on extra-messy days without fighting a full reinstallation.
Make It Look Good: 2026 Design Styles and Finish Ideas
Style Directions: Modern Minimal, Warm Wood, or Modern Farmhouse
Think of your entryway bench with storage as a visual handshake for your home. In modern minimal spaces, keep lines clean, fronts flat, and hardware slim in black or brushed nickel. Warm wood styles lean into visible grain, rounded corners, and earthy textile cushions. Modern farmhouse often pairs painted bases with a natural wood seat and matte black hooks above. Recent entryway trend roundups highlight benches paired with built-in cubbies and hooks as a go-to way to keep everyday clutter organized while staying stylish (Houzz Home Design Trends, 2024). (Houzz) Matching your bench color to your trim or front door can visually “anchor” the whole zone and make tight spaces feel intentional, not cramped.
Finishes That Survive Real Life
Entryways see grit, road salt, and kids’ scooter impacts, so choose finishes that wipe clean without feeling sticky.
- For painted benches, use a high-quality acrylic enamel in satin or semi-gloss; it’s tougher than standard wall paint and easier to scrub.
- For wood tones, a stain plus two or three coats of water-based polyurethane keeps the grain visible and adds protection.
Aim for a sheen that hides scuffs: ultra-gloss shows every mark, while dead-flat can burnish over time. In one small condo, the owner chose a warm greige paint on the base and a mid-tone oak seat; years later, the inevitable shoe scuffs just read as gentle patina.
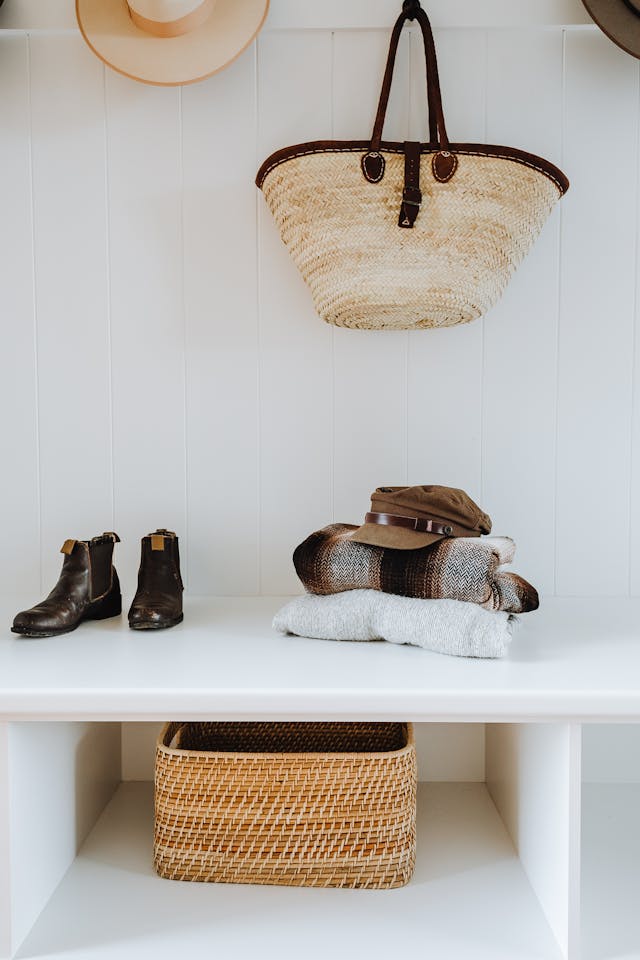
Styling the Bench Without Clutter
Once your bench is built, resist the temptation to overload it with decor. A simple rule of thumb is “one tray, one light, one basket.” Use a shallow tray on top for keys and mail, a nearby sconce or lamp to make late arrivals feel welcoming, and a single basket under or beside the bench for hats and gloves. Rotate what lives in the bench seasonally: in winter, prioritize boots, umbrellas, and thick scarves; in summer, swap in sandals, sun hats, and beach totes. This tiny quarterly reset keeps storage relevant and prevents your beautiful build from turning into a random catchall.
DIY vs. Ready-Made: When Building Makes Sense
Not everyone needs—or wants—to DIY. In 2024, about 61% of homeowners were planning at least one home improvement project in the first quarter alone (Home Improvement Research Institute, 2024). Many of those projects are small, targeted upgrades, exactly where a custom bench shines. Building your own bench makes sense if you have odd dimensions, baseboard heaters, or existing trim you want to work around, and you enjoy basic woodworking. A ready-made bench is better if you’re short on tools, time, or storage, or you prefer a polished, warranty-backed piece. Some homeowners even combine both: a store-bought entryway bench with shoe storage paired with custom wall panels, hooks, and a DIY top to create a semi-built-in look.
| Aspect | DIY Entryway Bench with Storage | Ready-Made Entryway Bench with Storage |
| Fit & Dimensions | Custom-sized to awkward corners, narrow hallways, or around heaters and trim. | Limited to standard sizes; may waste space or block outlets/vents. |
| Design Control | Full control over layout, shoe storage type, finishes, and add-ons like charging, hooks, pet zone. | Pre-set design; only small choices like color or cushion style. |
| Skill & Time | Requires basic tools, planning, and several hours or a weekend to build and finish. | Fast and convenient; just assemble or place it once delivered. |
| Cost Range | Often cheaper for mid–high quality if you already own tools; material cost is flexible. | Wide price range; high-quality or solid wood models can be expensive. |
| Durability & Repair | Easy to reinforce, repaint, or modify over time as needs change. | Harder to alter; if damaged, replacement is more common than repair. |
| Satisfaction | High sense of ownership and pride in a tailored solution. | Low effort and stress; good for those who prioritize convenience. |
Conclusion: Your Entryway, Upgraded for Everyday Life
A well-planned entryway bench with storage is a small project with big daily payoffs. It tames shoes, softens landings after long days, and sets the tone for the rest of your home. In a world where clutter and busyness easily spill over, designing this one hardworking zone can bring a surprising sense of calm. Whether you build from scratch or tweak a ready-made piece, you’re creating more than a bench—you’re creating a stress-free moment every time you step through the door.
Q&A (FAQ)
What’s the best height for an entryway bench with storage?
Most people find a bench height of 17–19 inches comfortable, similar to a dining chair. If you have very tall family members, you can push closer to 19 inches; for kids and shorter adults, 17–18 inches makes it easier to sit, tie shoes, and stand up without strain.
What depth works for a narrow hallway entryway bench with shoe storage?
For tight hallways, try a depth of 14–15 inches so the bench doesn’t feel like an obstacle. In larger foyers or mudrooms, 16–18 inches gives more sitting comfort and space for deeper shoes. Always pair the depth with at least 36 inches of clear walking path in front for doors and daily traffic.
How much weight should the bench support?
Aim for a minimum of 250–300 pounds in the center of the seat to safely support an adult plus the occasional child or bag. Using 3/4 inch plywood, strong joinery, and at least one internal support or leg under wide spans helps you reach this capacity. When in doubt, add more internal bracing, not less.
What’s the easiest “how to build a entryway bench with storage” approach for beginners?
The simplest beginner build is a rectangular plywood box with open cubbies and a separate seat panel screwed on top. You can skip drawers and tilt-outs and use simple pocket-hole or screw-and-cleat joinery. Paint hides minor imperfections, so focus on getting it square and sturdy rather than obsessing over flawless cuts.
How do I prevent shoe smell and moisture buildup in cubbies?
First, give shoes a chance to air out: open cubbies or front slats allow airflow. Add a few small ventilation gaps at the back, and avoid lining cubbies with non-breathable plastic. Use washable mats or tiles at the bottom of each cubby to catch dirt, and occasionally sprinkle baking soda or use charcoal deodorizers in heavily used sections.