 By Stephanie
Choosing a media console for an AV receiver is different from choosing a TV stand for a screen alone. Your receiver needs enough interior depth for connected cables, enough open space to release heat, and enough access for everyday use. The direct answer is simple: an AV receiver can go inside a TV stand only when the cabinet passes a fit test for depth, ventilation, and cable clearance. This guide helps first-time home theater buyers compare deep media consoles before they buy and choose a setup that looks calm and works reliably.
Table of Contents
What to Measure Before Choosing a Media Console
Do not start with a finish or a TV-size label. First, confirm the receiver’s real footprint once it is connected. A cabinet can look large yet fail because plugs, cable bends, and top vents need more room than its shelf provides.
Measure Your Receiver in Its Installed Position
Many shoppers use “amplifier” and “AV receiver” interchangeably. A stereo amplifier usually powers two speakers, while an AV receiver often powers several speakers and connects your TV, streaming device, game console, and other home theater components. That usually makes it one of the deepest and hottest pieces of equipment in a setup—and one of the easiest to underestimate when choosing a media console.
Measure the receiver as it will be installed, not just as it appears in the product listing. Include the unit itself, front controls, rear connections, HDMI plugs, speaker-wire bends, Ethernet cable, antennas, and feet. Then compare those measurements with the cabinet’s clear interior width, height, and depth—not its outside dimensions.
Use the Five-Point Fit Test Before You Buy
Use this checklist to decide whether a media console is worth considering before you compare finishes, sizes, or prices. It is a pass-or-fail screen, not a full measurement guide. The next sections explain how to check each requirement in detail.
- Depth: The connected receiver fits inside the shelf.
- Height: The required clearance remains above the receiver.
- Width: The cabinet does not press against either side of the unit.
- Air path: Air can enter the compartment and exit freely.
- Daily access: Doors close properly, and key connections remain reachable.
If the answer is “no” to any one of these checks, remove that cabinet from your shortlist. Do not rely on adapters, tighter cable bends, or a closed-door workaround to make an unsuitable compartment fit.
Choose the Right Interior Depth for Your AV Receiver
Depth is often the deciding measurement. Do not rely on a product photo or a cabinet’s overall depth. Start with the receiver’s installed depth, then leave room for cable bends and small adjustments later when you add or replace equipment.
Calculate the Interior Depth You Actually Need
Use this formula:
Minimum internal shelf depth = receiver body depth + deepest plug or cable projection + service gap
A 16-inch receiver may need another 2 to 3 inches once HDMI, power, Ethernet, and speaker connections are attached. Add a small service gap so cables are not bent against the back panel and you can reach them later.
The number that matters is clear internal shelf depth, not the console’s overall exterior depth. Doors, face frames, shelf lips, and rear panels can reduce usable space by several inches. Before ordering, confirm the clear depth behind the doors, the location of rear cable openings, and the space between the console and the wall. A cabinet that is 20 inches deep on the outside can still be too shallow if the shelf itself is only 16 inches deep.
Match the Console Depth to Your AVR Setup
Once you know your receiver’s installed depth, the choice becomes much clearer. A 17.7-inch interior bay can work for a standard AVR setup only when your receiver’s installed depth, connected cables, and manufacturer-required clearance fit comfortably within it. Consider an 18.3-inch interior only after confirming that your receiver’s installed depth, rear connections, and required clearance still fit comfortably.
For a typical living-room system with a standard AVR, streaming box, and one game console, the Arboren Deep Vented Rolling Media Console gives you 17.7 inches of usable interior depth in a warm walnut plywood design. Its two removable shelves make it easier to set up components at different heights, while the open back, multiple cable openings, and hidden locking wheels keep future cable changes and behind-the-console cleaning from becoming a major job.
For larger AVR-based home theater systems—including setups that pair a receiver with a soundbar, multiple source devices, or thicker speaker cables—the extra-deep media console for large AV receivers offers a more spacious 18.3-inch internal depth. It is designed to give bulky AV receivers and larger home theater components more room for rear connections and cable bends.
Choose Ventilation Features That Protect Your Receiver
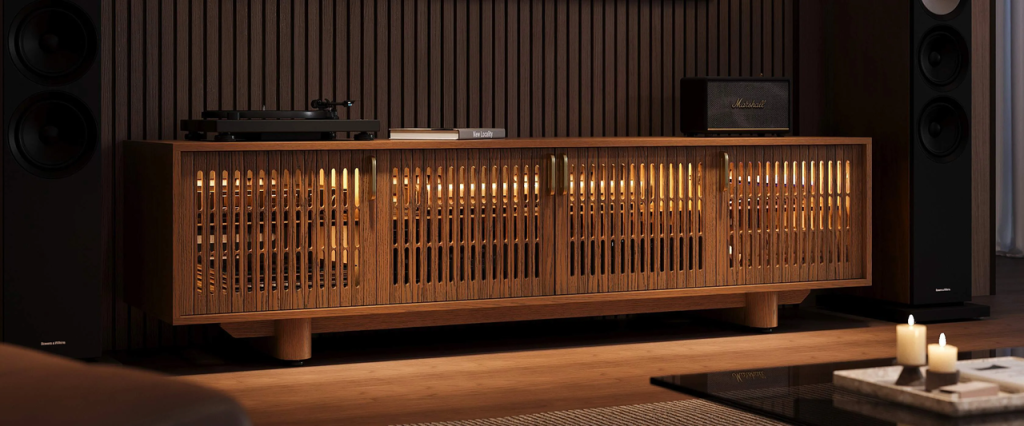
A receiver can fit inside a cabinet and still be a poor long-term setup if heat cannot escape. Heat rises through its vents, especially during long movies, weekend sports, or gaming sessions. The right media console gives heat a path out through open space, rear ventilation, and breathable door construction instead of trapping it around your equipment.
Check Your AV Receiver Manual for Clearance Requirements
Your AV receiver’s manual—not the media console product page—is the final authority on how much open space it needs. Clearance requirements vary by model, power output, and listening habits, so check the manufacturer’s ventilation guidance before placing the receiver inside any cabinet.
If the receiver manual calls for more space than the compartment provides, choose a taller bay, an open shelf, or a media console with better ventilation. The console’s product page can help you check interior depth and vent design, but the AV receiver manual tells you how much breathing room the receiver needs.
Build an Air Path, Not a Closed Box
A small gap is not enough. Cool air needs a way into the cabinet, and warm air needs a route out. Look for rear vents or openings, slatted or perforated doors, and clear space above the receiver. Keep a vent back from sitting flush against the wall, or the warm air will have nowhere to go.
During a Saturday movie marathon, a receiver, 65-inch TV, and game console can run for hours. A ventilated media console keeps those devices from turning into a warm cluster behind closed doors. An external cooling fan can help only after the cabinet already has correct clearance and a real airflow path. It cannot make a shallow or sealed compartment safe.
Choose Everyday Features for a Cleaner Home Theater Setup
Once the receiver meets the depth and ventilation requirements, the console still needs to work well in daily life. You should be able to switch inputs, reconnect HDMI, charge controllers, and use the remote without pulling the furniture away from the wall. These details determine whether the setup stays organized or becomes frustrating after a few weeks.
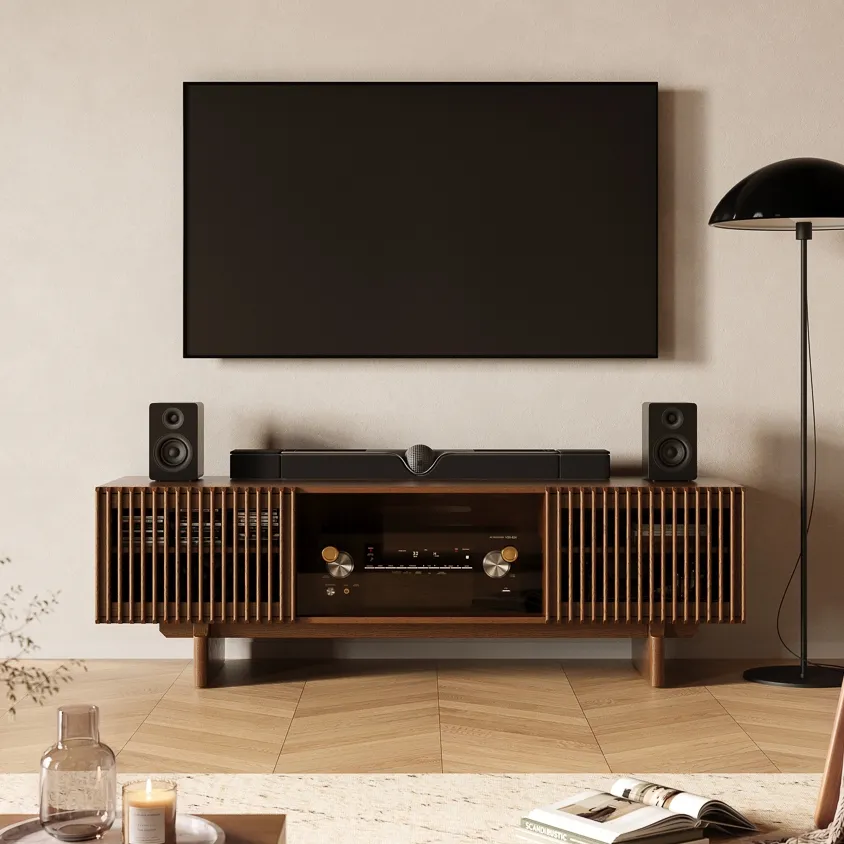
Look for rear cable holes or an accessible back panel so speaker wire, HDMI cables, power cords, Ethernet, and TV audio connections do not become a tangled pile behind the receiver. Thoughtful TV stand cable management for hidden cables uses rear cutouts, short labeled cable runs, and reusable hook-and-loop ties. Leave a small service loop near the receiver so you can reconnect a cable without moving the console.
Door style also affects everyday use. Open shelves provide the easiest access but leave equipment visible. Slatted doors offer a cleaner look while allowing compatible infrared remotes to reach the components inside. Glass doors may also work, while solid doors usually require an IR repeater, RF remote, or app control.
Give the receiver and gaming console separate compartments whenever possible. A PS5, Xbox, or gaming PC should have its own space for controllers, discs, and charging cables rather than sitting on top of the receiver or sharing one crowded bay.
Compare Media Console Configurations Before You Buy
At this point, you should know your receiver’s installed depth, clearance needs, and cable requirements. Use those details to choose the right console category for your setup. The goal is not to buy the deepest cabinet available. It is to choose a console that matches your receiver’s installed dimensions, ventilation needs, and living-room layout.
| Your setup | Best console direction |
| Streaming box, soundbar, or compact stereo amp | A standard media console with verified interior depth |
| Standard AV receiver and one game console | A deep ventilated media console designed for full-size AV equipment |
| Large multi-channel AVR with multiple source devices | An extra-deep media console with flexible storage space |
| A closed-door family-room setup | A media console with remote-friendly doors and accessible rear connections |
Before ordering, mark the console’s footprint on the floor with painter’s tape. Make sure it fits the room without narrowing the main walkway, and leave some flexibility for the equipment you may add later.
Conclusion
Choose a media console around your AV receiver, not the other way around. Measure the receiver after cables are connected, compare those numbers with the cabinet’s true interior dimensions, and follow the ventilation requirements in the manual. Then, look for rear access, remote-friendly doors, separate space for gaming gear, and shelf flexibility for future upgrades. A media console that passes those checks will keep the living room looking composed while making movie nights, game sessions, and routine maintenance easier, safer, and more enjoyable for the whole household from day one.
FAQs
Can a Surge Protector Go Inside a Media Console?
Yes, if it stays dry, accessible, and away from the receiver’s exhaust path. Secure it where cords are not under tension. Use a properly rated surge protector, and never connect one power strip to another. Keep spare cable length clear of ventilation openings.
How Often Should I Clean the Console Vents?
Check vents, shelves, and rear cable openings every three to six months, or more often with pets, rugs, or open windows. Turn off and unplug the equipment first. Use a soft brush vacuum attachment and dry microfiber cloth to remove dust that could restrict airflow.
Can I Put a Center Speaker Inside a Media Console?
A center speaker can sit inside an open, front-facing compartment if the shelf is wide enough and does not block the speaker grille. Avoid placing it in a closed cabinet or behind a solid door, for that can reduce dialogue clarity and make voices sound boxed in.
What if My Receiver Has Rear-Facing Wi-Fi or Bluetooth Antennas?
Measure antennas in their normal operating position before choosing a cabinet. Do not press them against a rear panel or metal surface. If the signal becomes weak after installation, move the receiver forward slightly or use a manufacturer-approved antenna solution.


[…] a full-size receiver sets the depth limit, the same media console clearance checks for an AV receiver apply to rear plugs, cable bends, and manufacturer-required operating […]
[…] maintenance. If that component is an AV receiver, measure it in its connected position; the same media console fit checks for an AV receiver with connected cables can then be applied without repeating the full measurement process […]